How To Create X Developer Account And Generate API Keys
What’s a Developer Account, and Why Do You Need One?
TweetAhead uses API keys to securely connect to X and post content on your behalf. To make this work, you’ll need a developer account on X. This guide will walk you through the setup process step-by-step.
Part 1: Creating Your Developer Account
If you already have a developer account, feel free to skip this section.
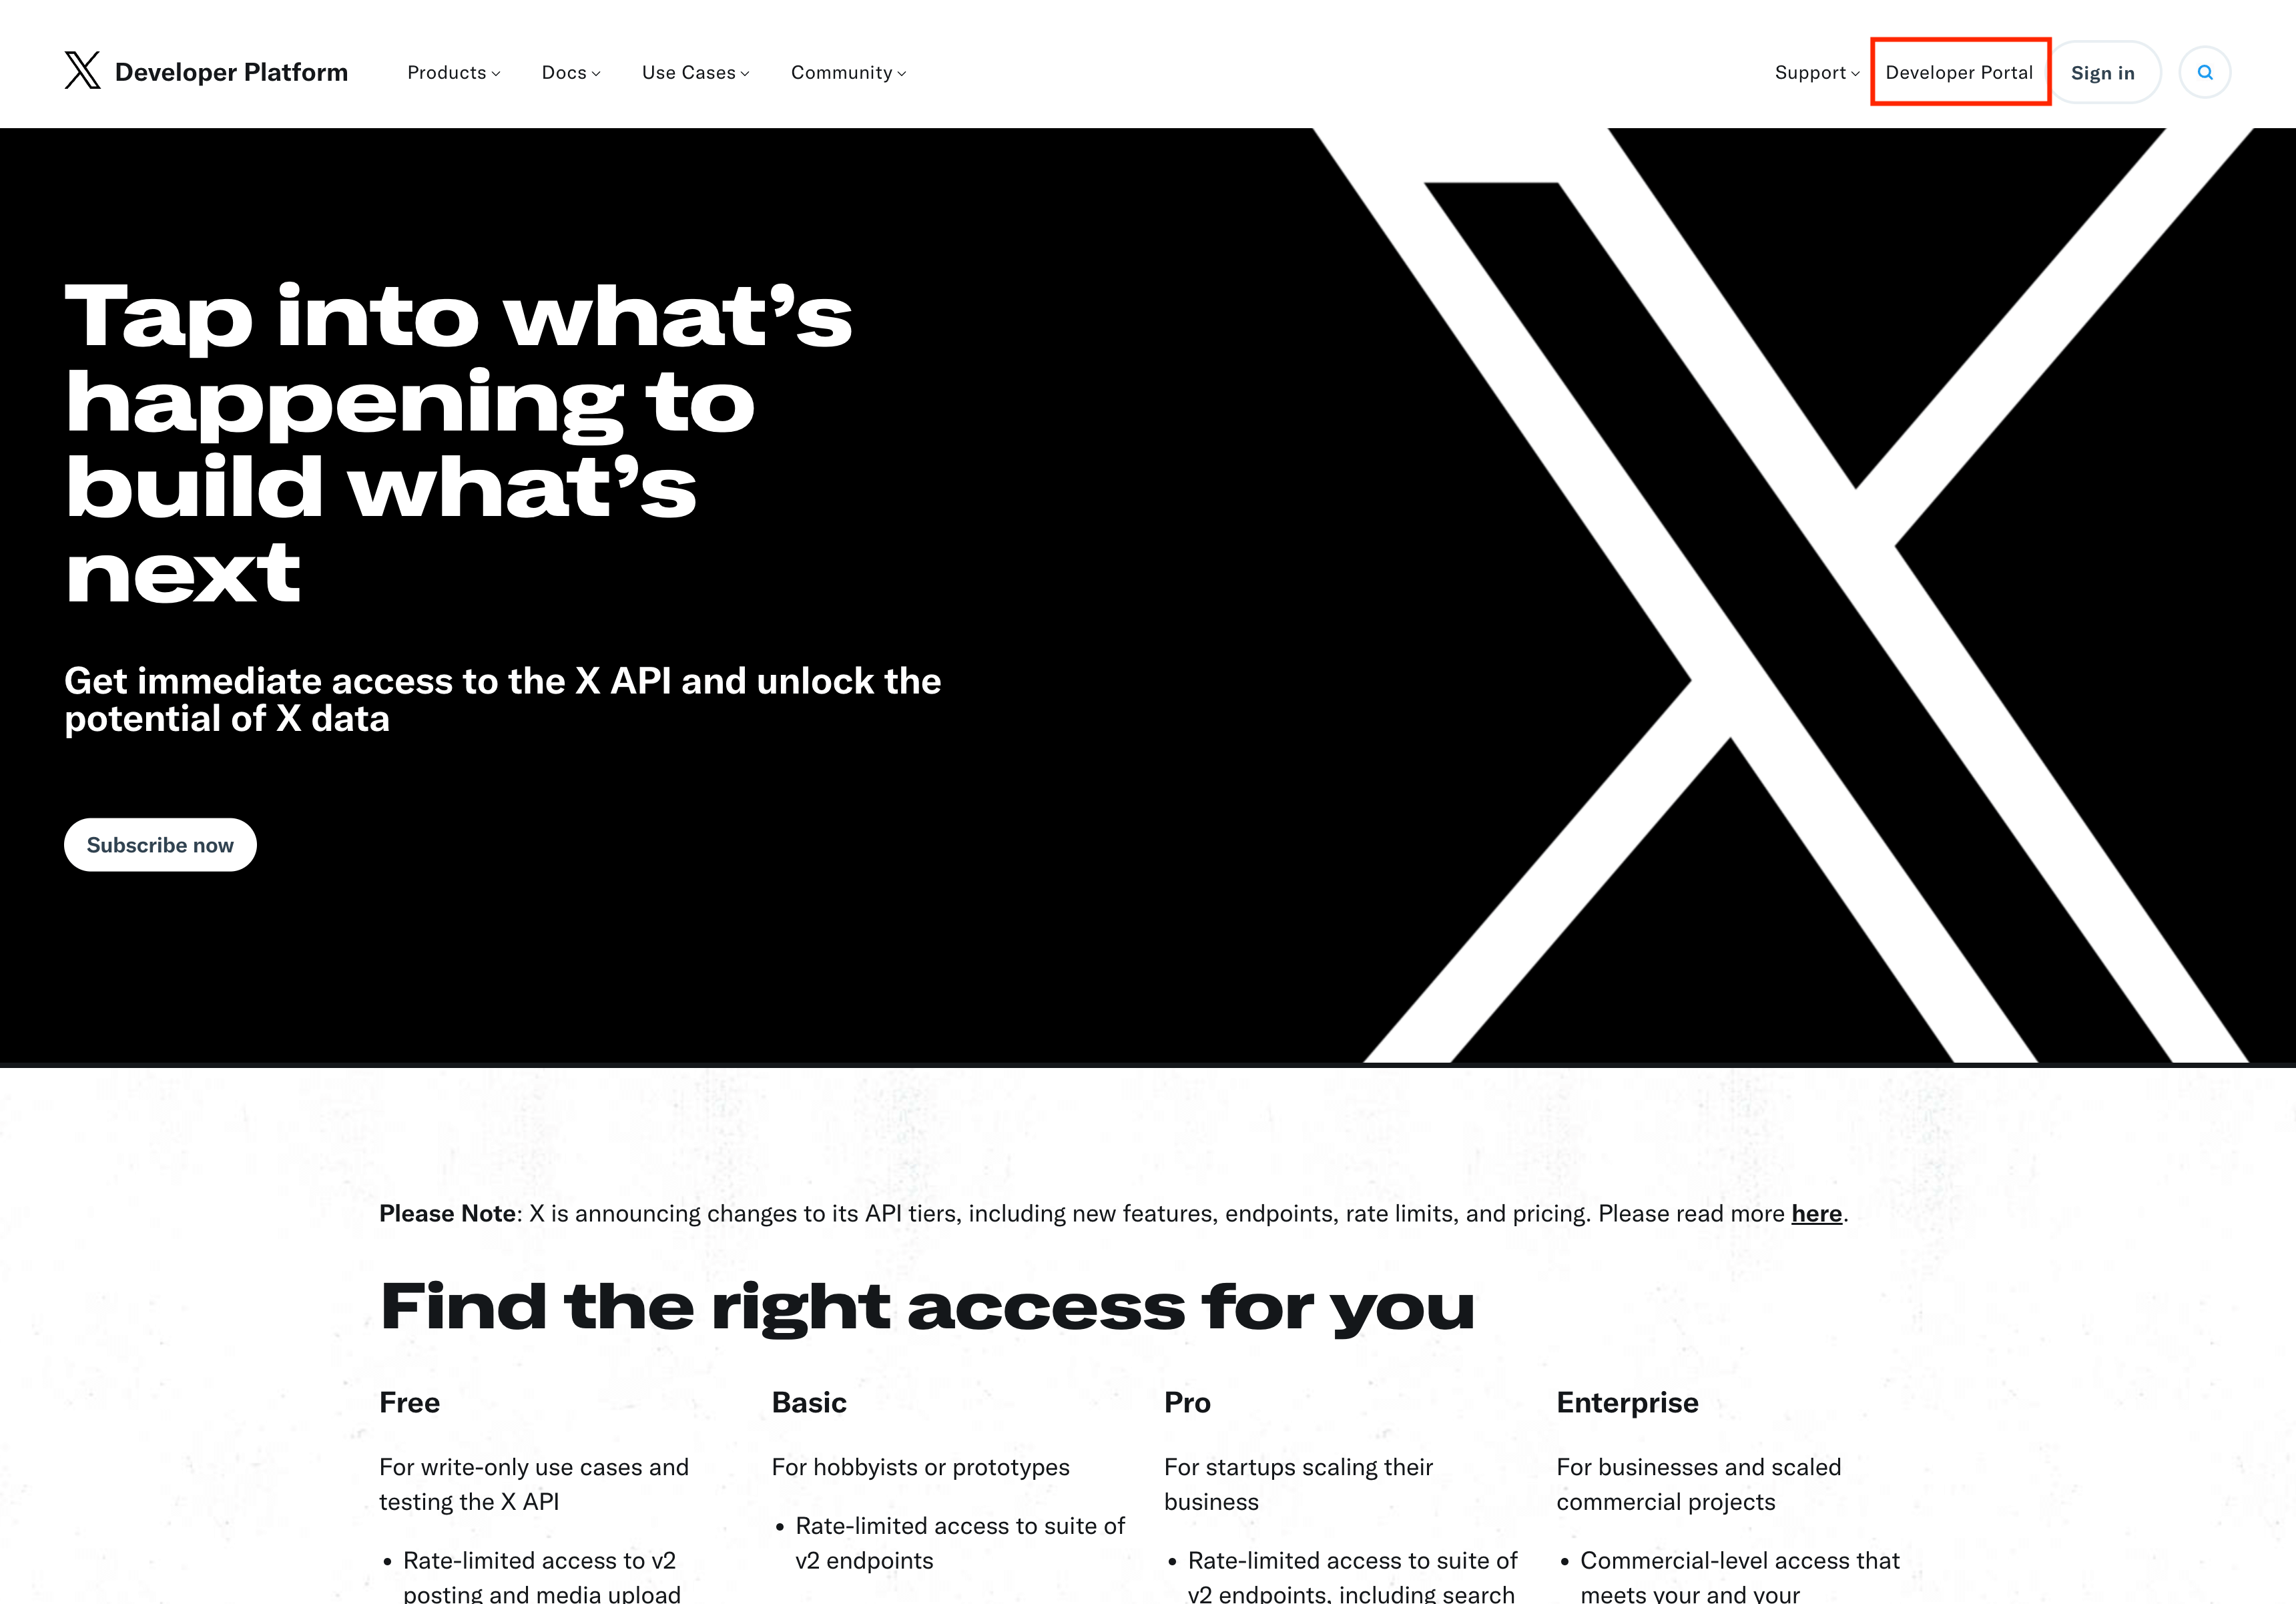
Step 1: Visit the Developer Portal
- Go to developers.x.com.
- Click on the Developer Portal link in the top-right corner.
- Log in with your X account.
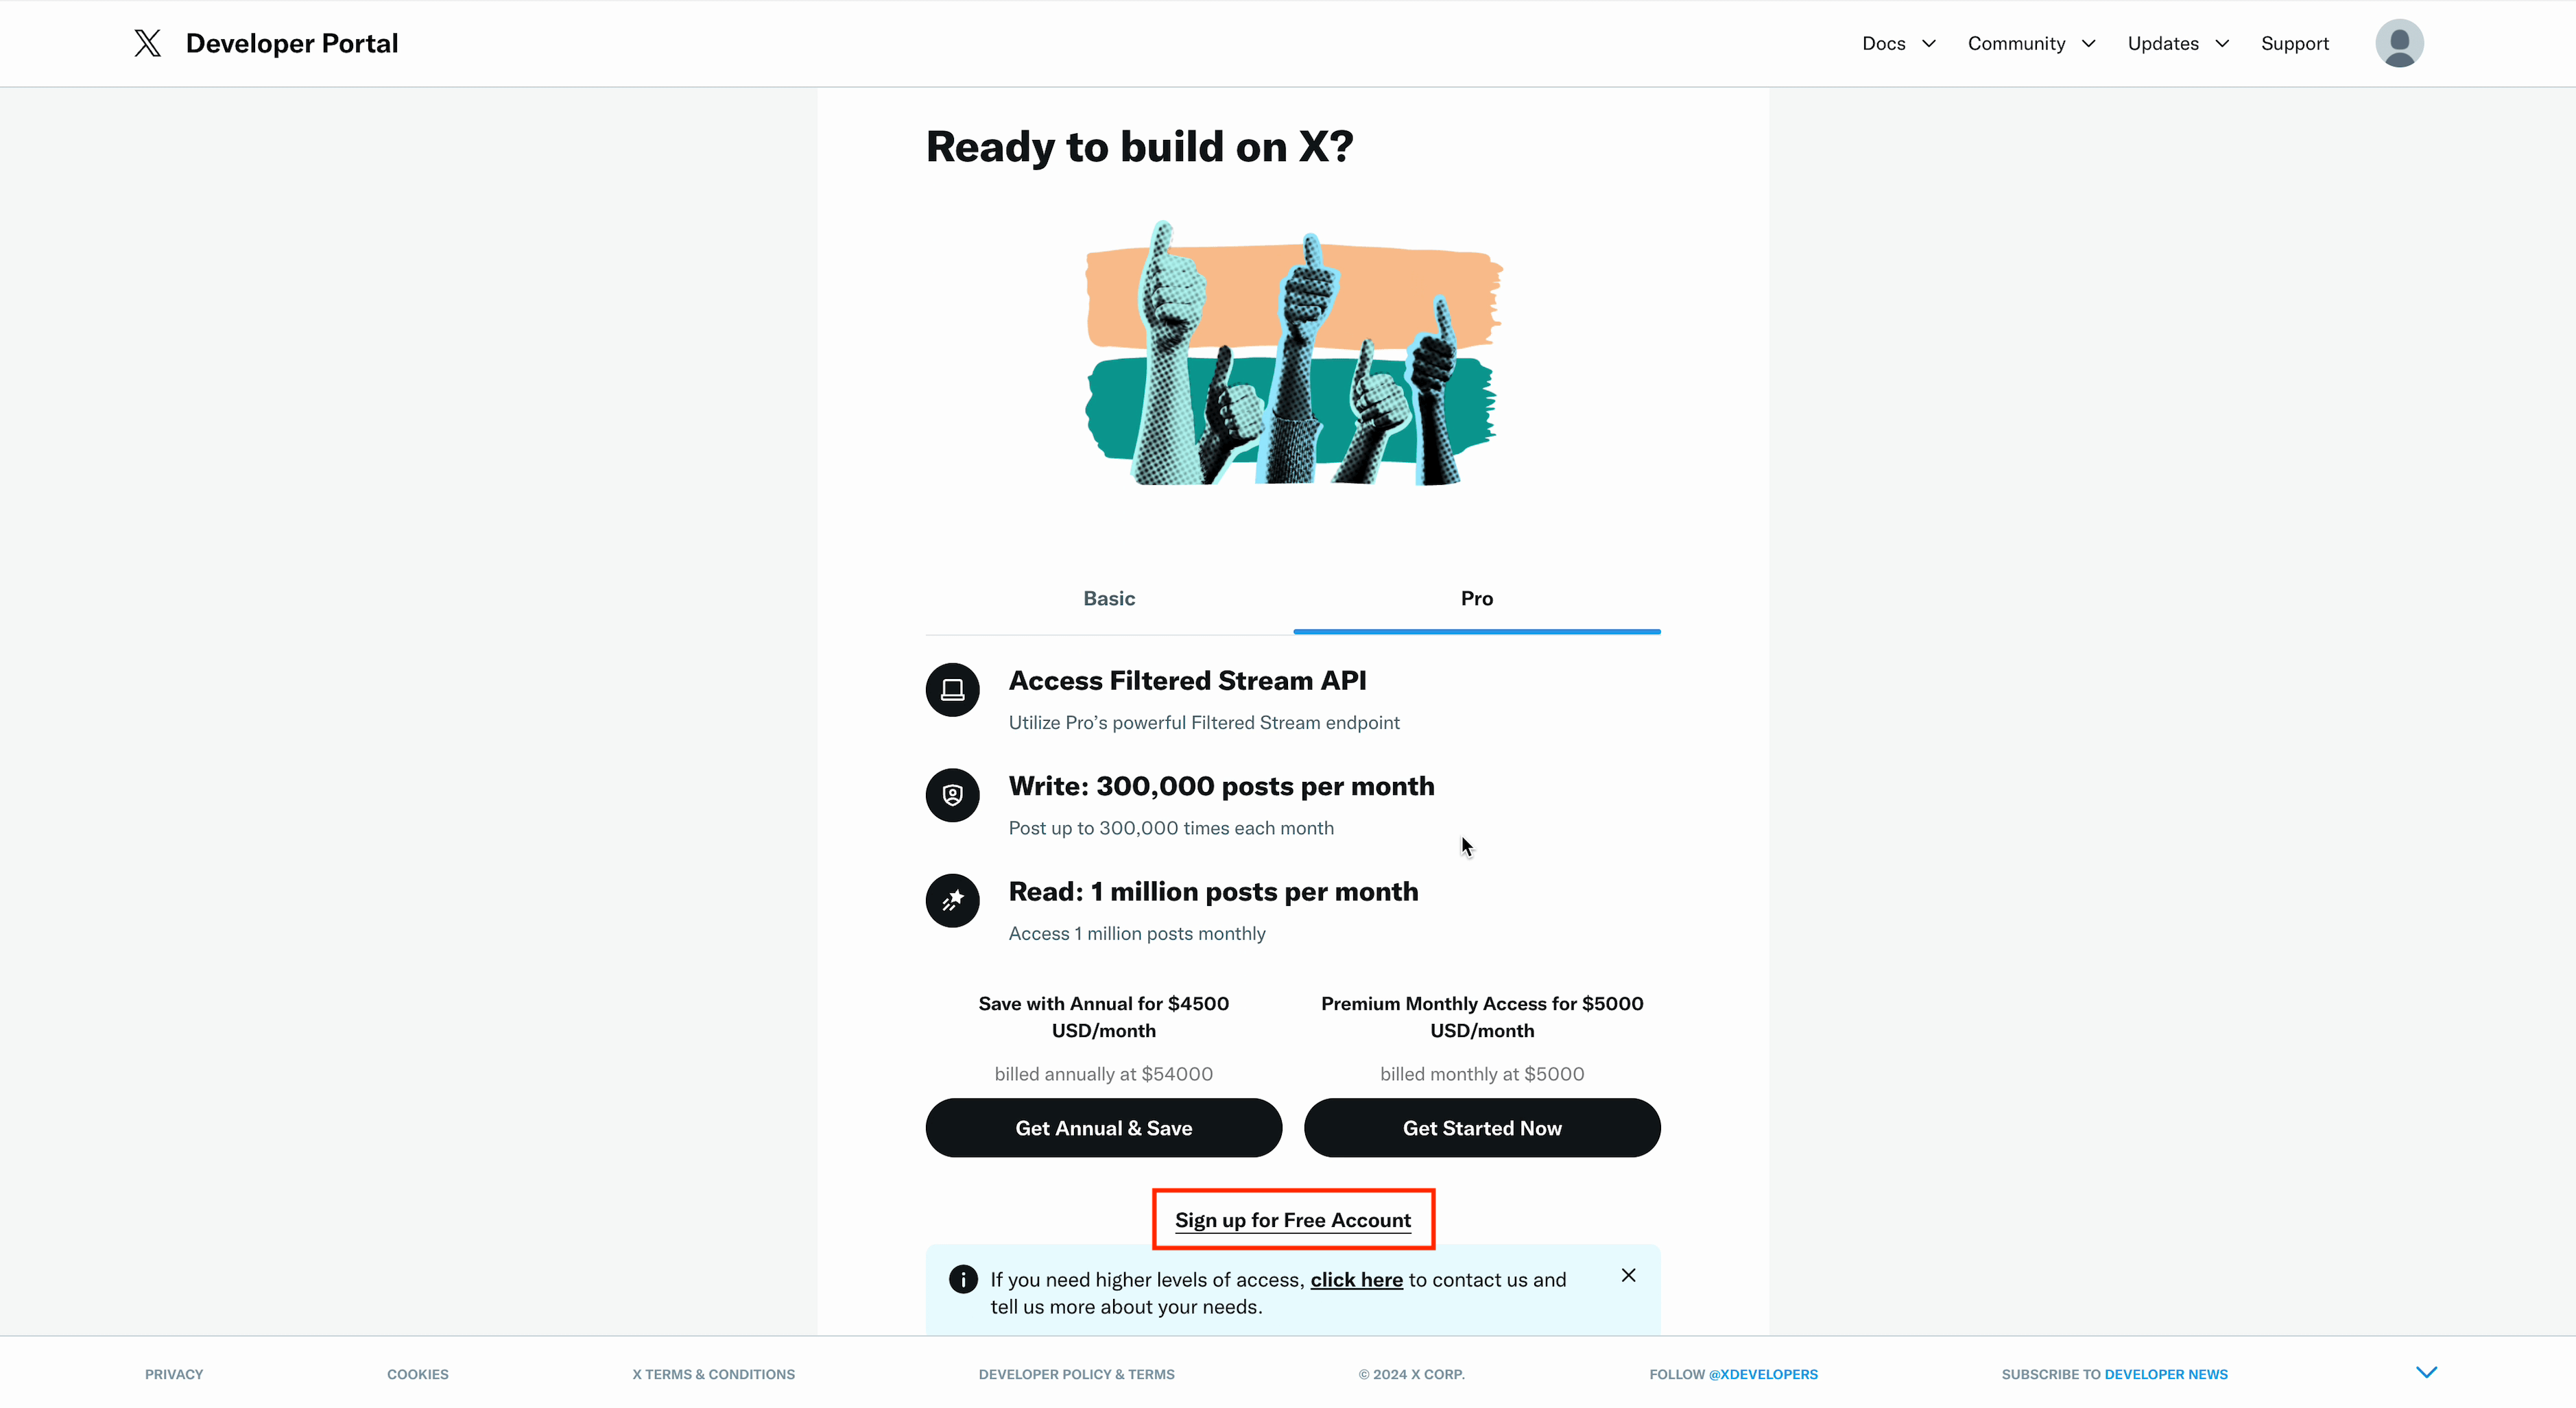
Step 2: Choose the Free Account Plan
- After logging in, you’ll be prompted to select an API plan. While X promotes two paid plans, you can choose the free tier instead.
- Look for the Sign Up for Free Account button (below the paid plans) and click it.
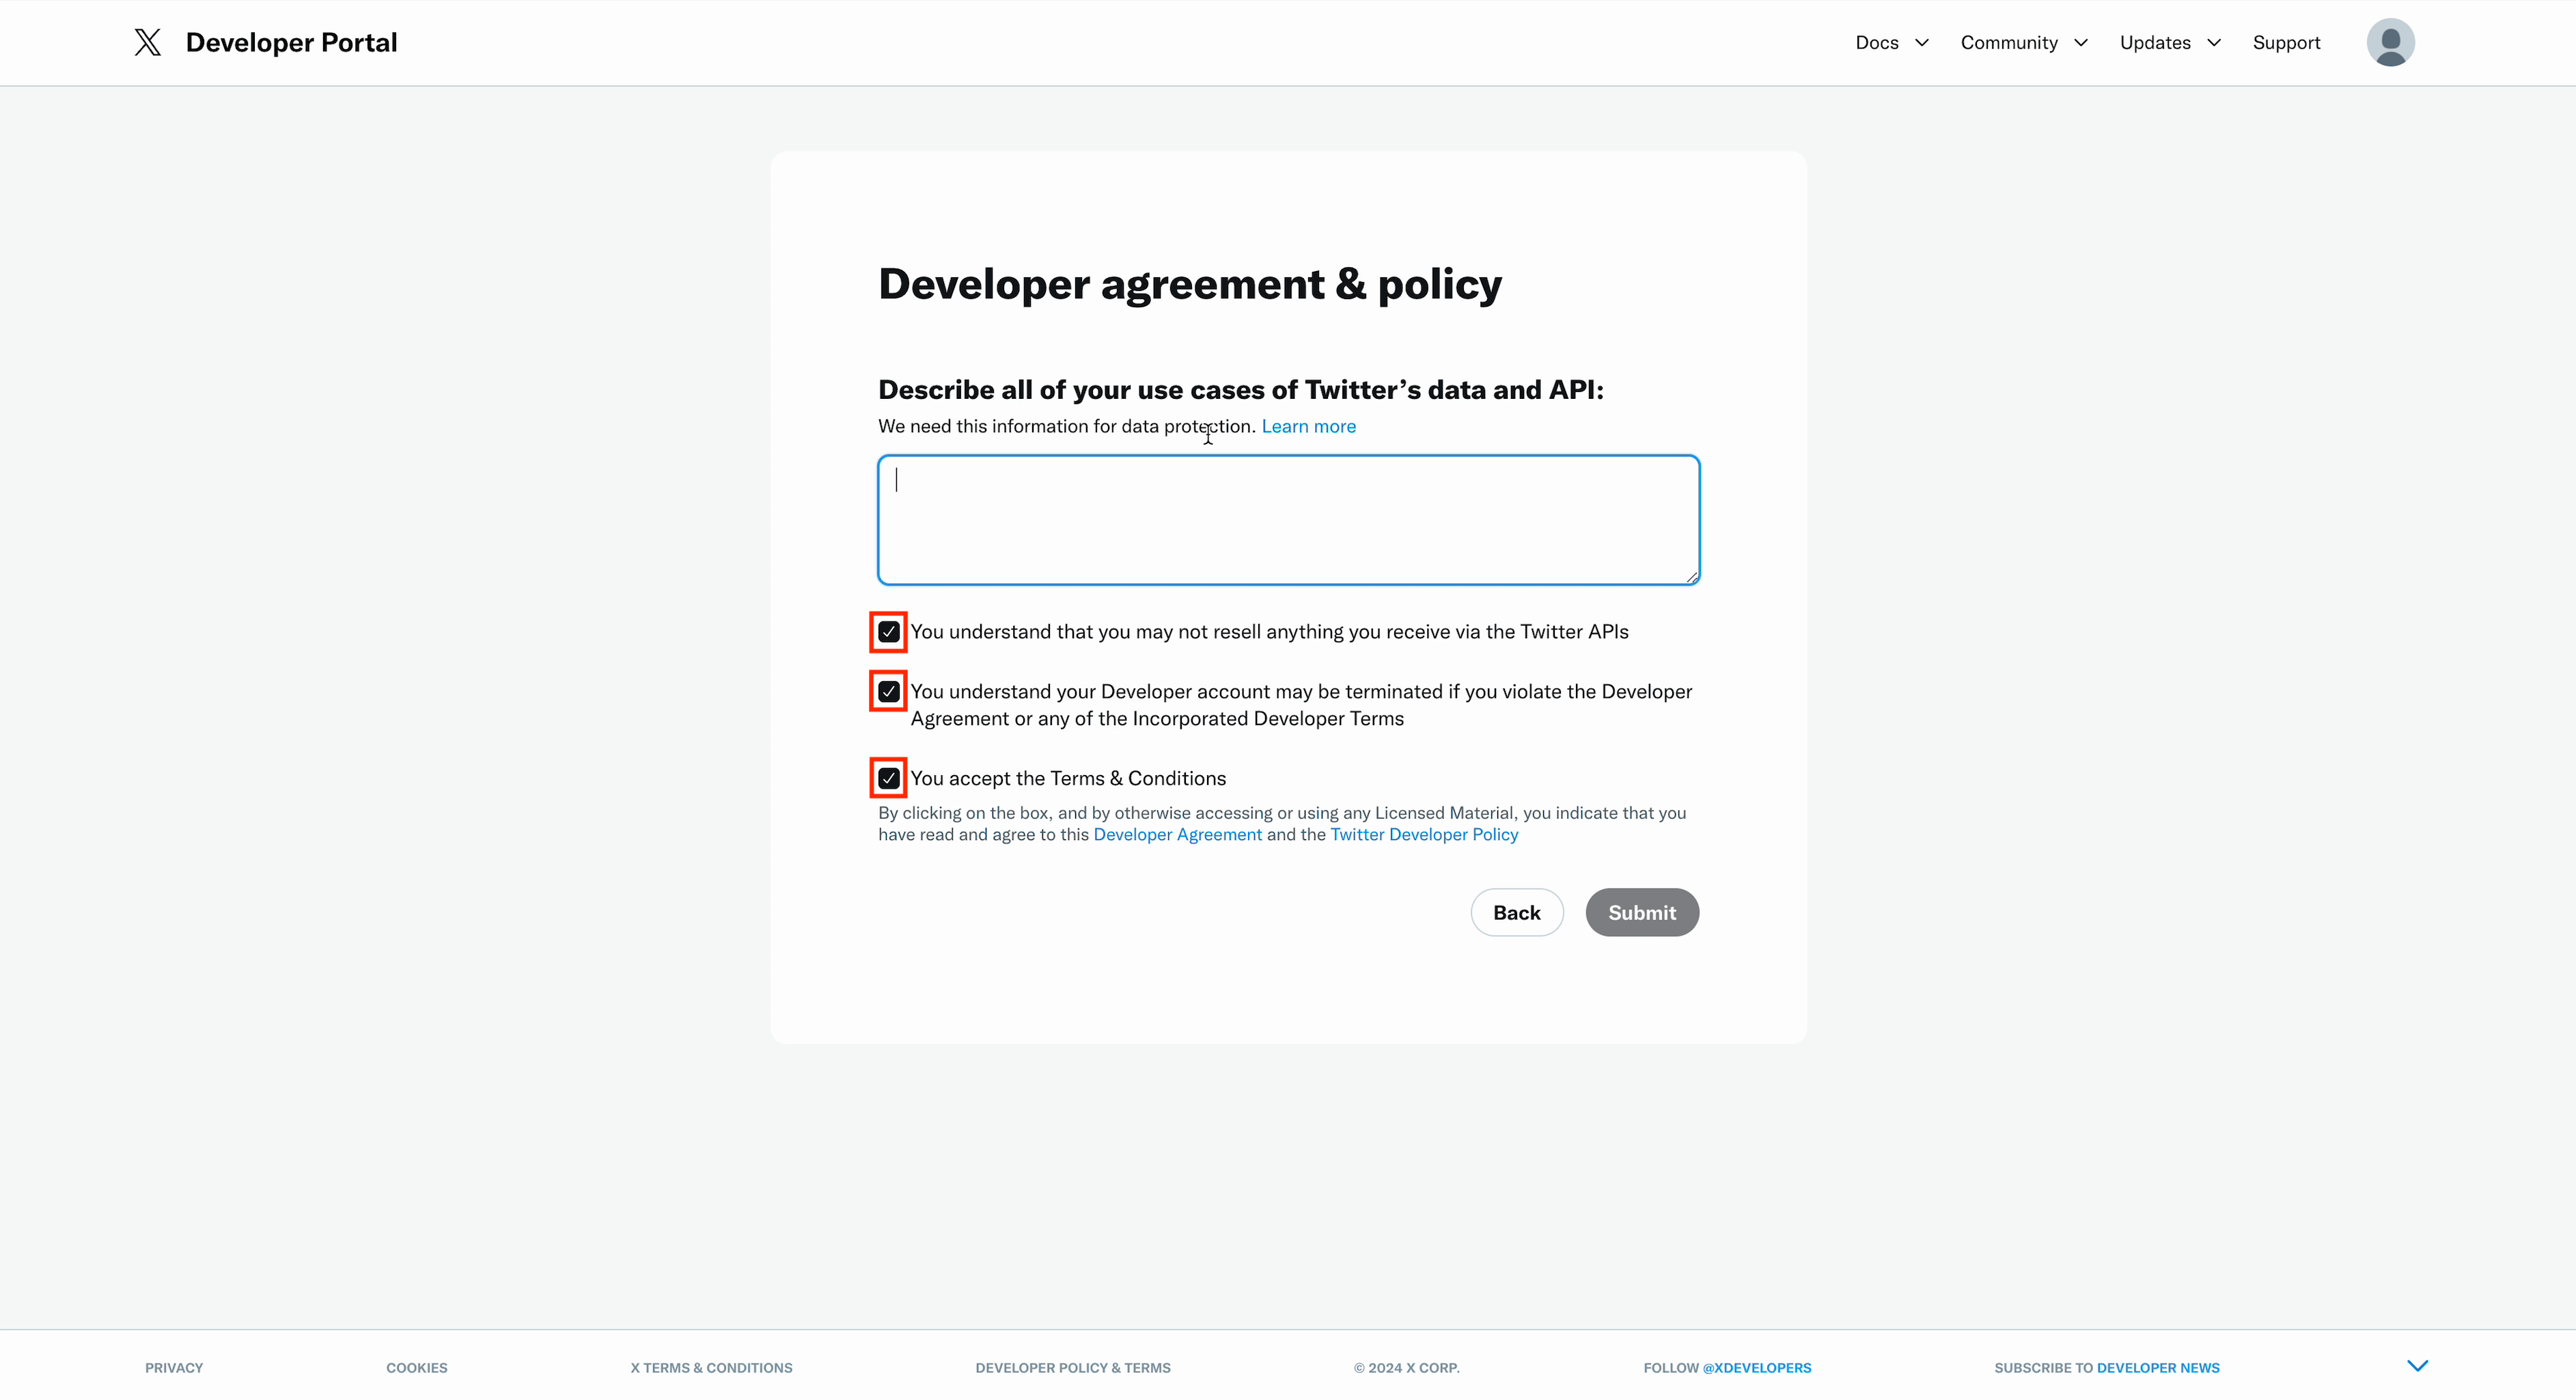
Step 3: Accept the Developer Agreement
- You’ll need to accept the development agreement and provide a short statement (minimum 250 characters) about how you plan to use the API.
- Use the example below if needed:
- Click Submit to complete this step. Your developer account is now ready!
I am applying for an X Developer Account to leverage the API for scheduling posts and managing my account more effectively. My goal is to utilize the API to maintain a consistent posting schedule, which is essential for growing my account and engaging with my audience.
Part 2: Configuring Your First X App
After creating your account, you’ll be redirected to the Developer Portal homepage. Here’s how to configure your app to work with TweetAhead.
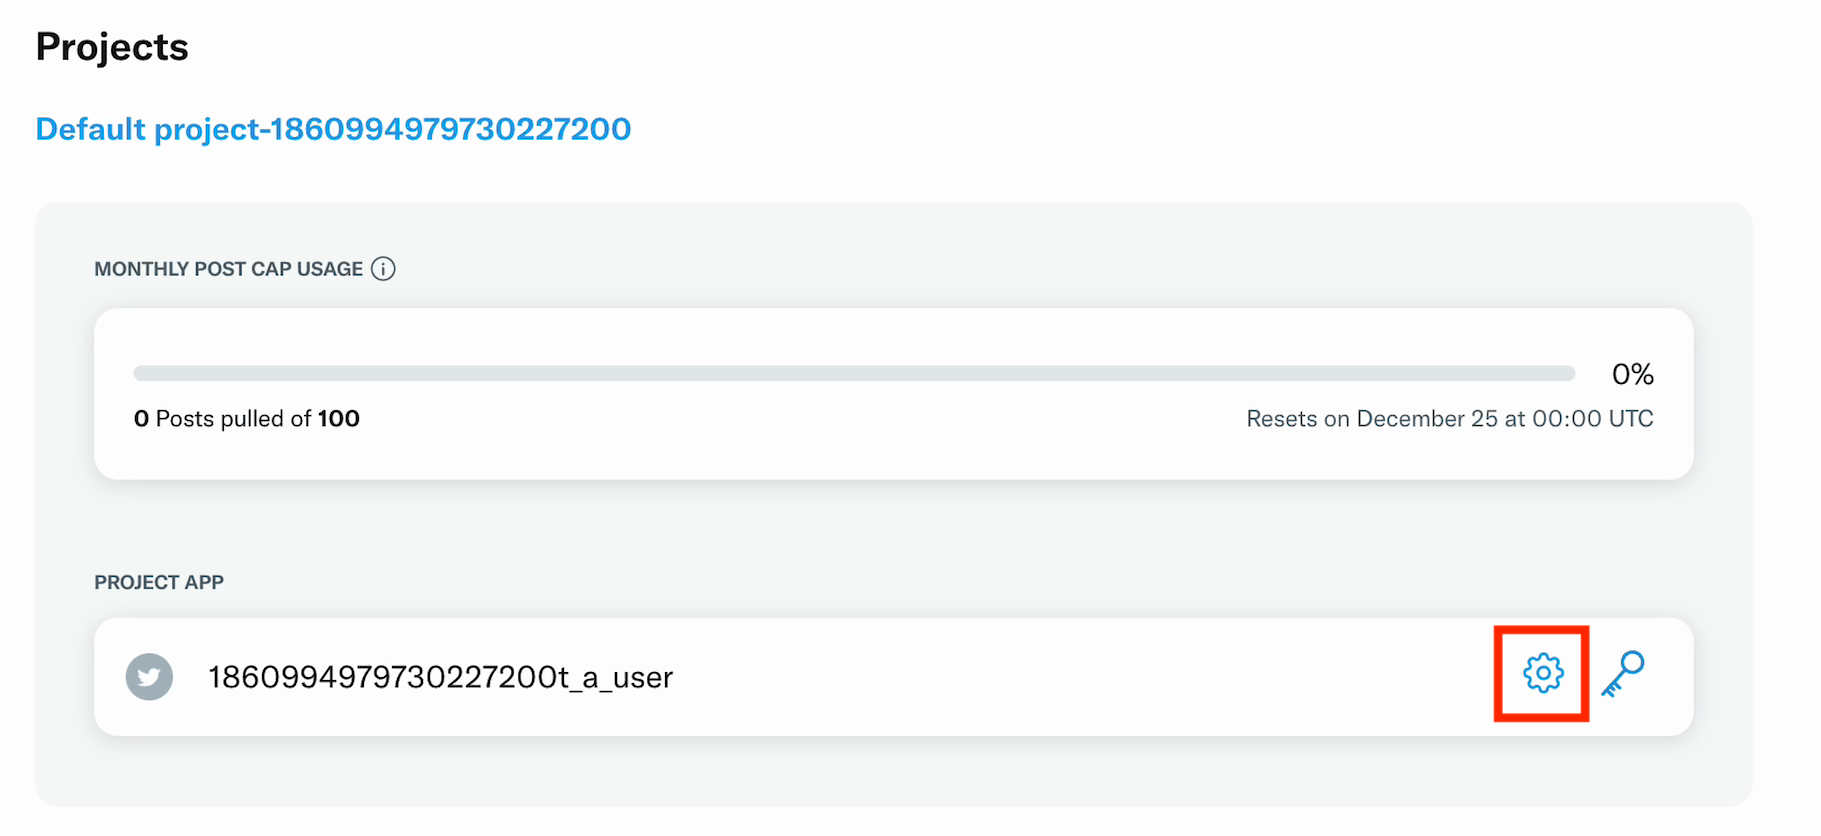
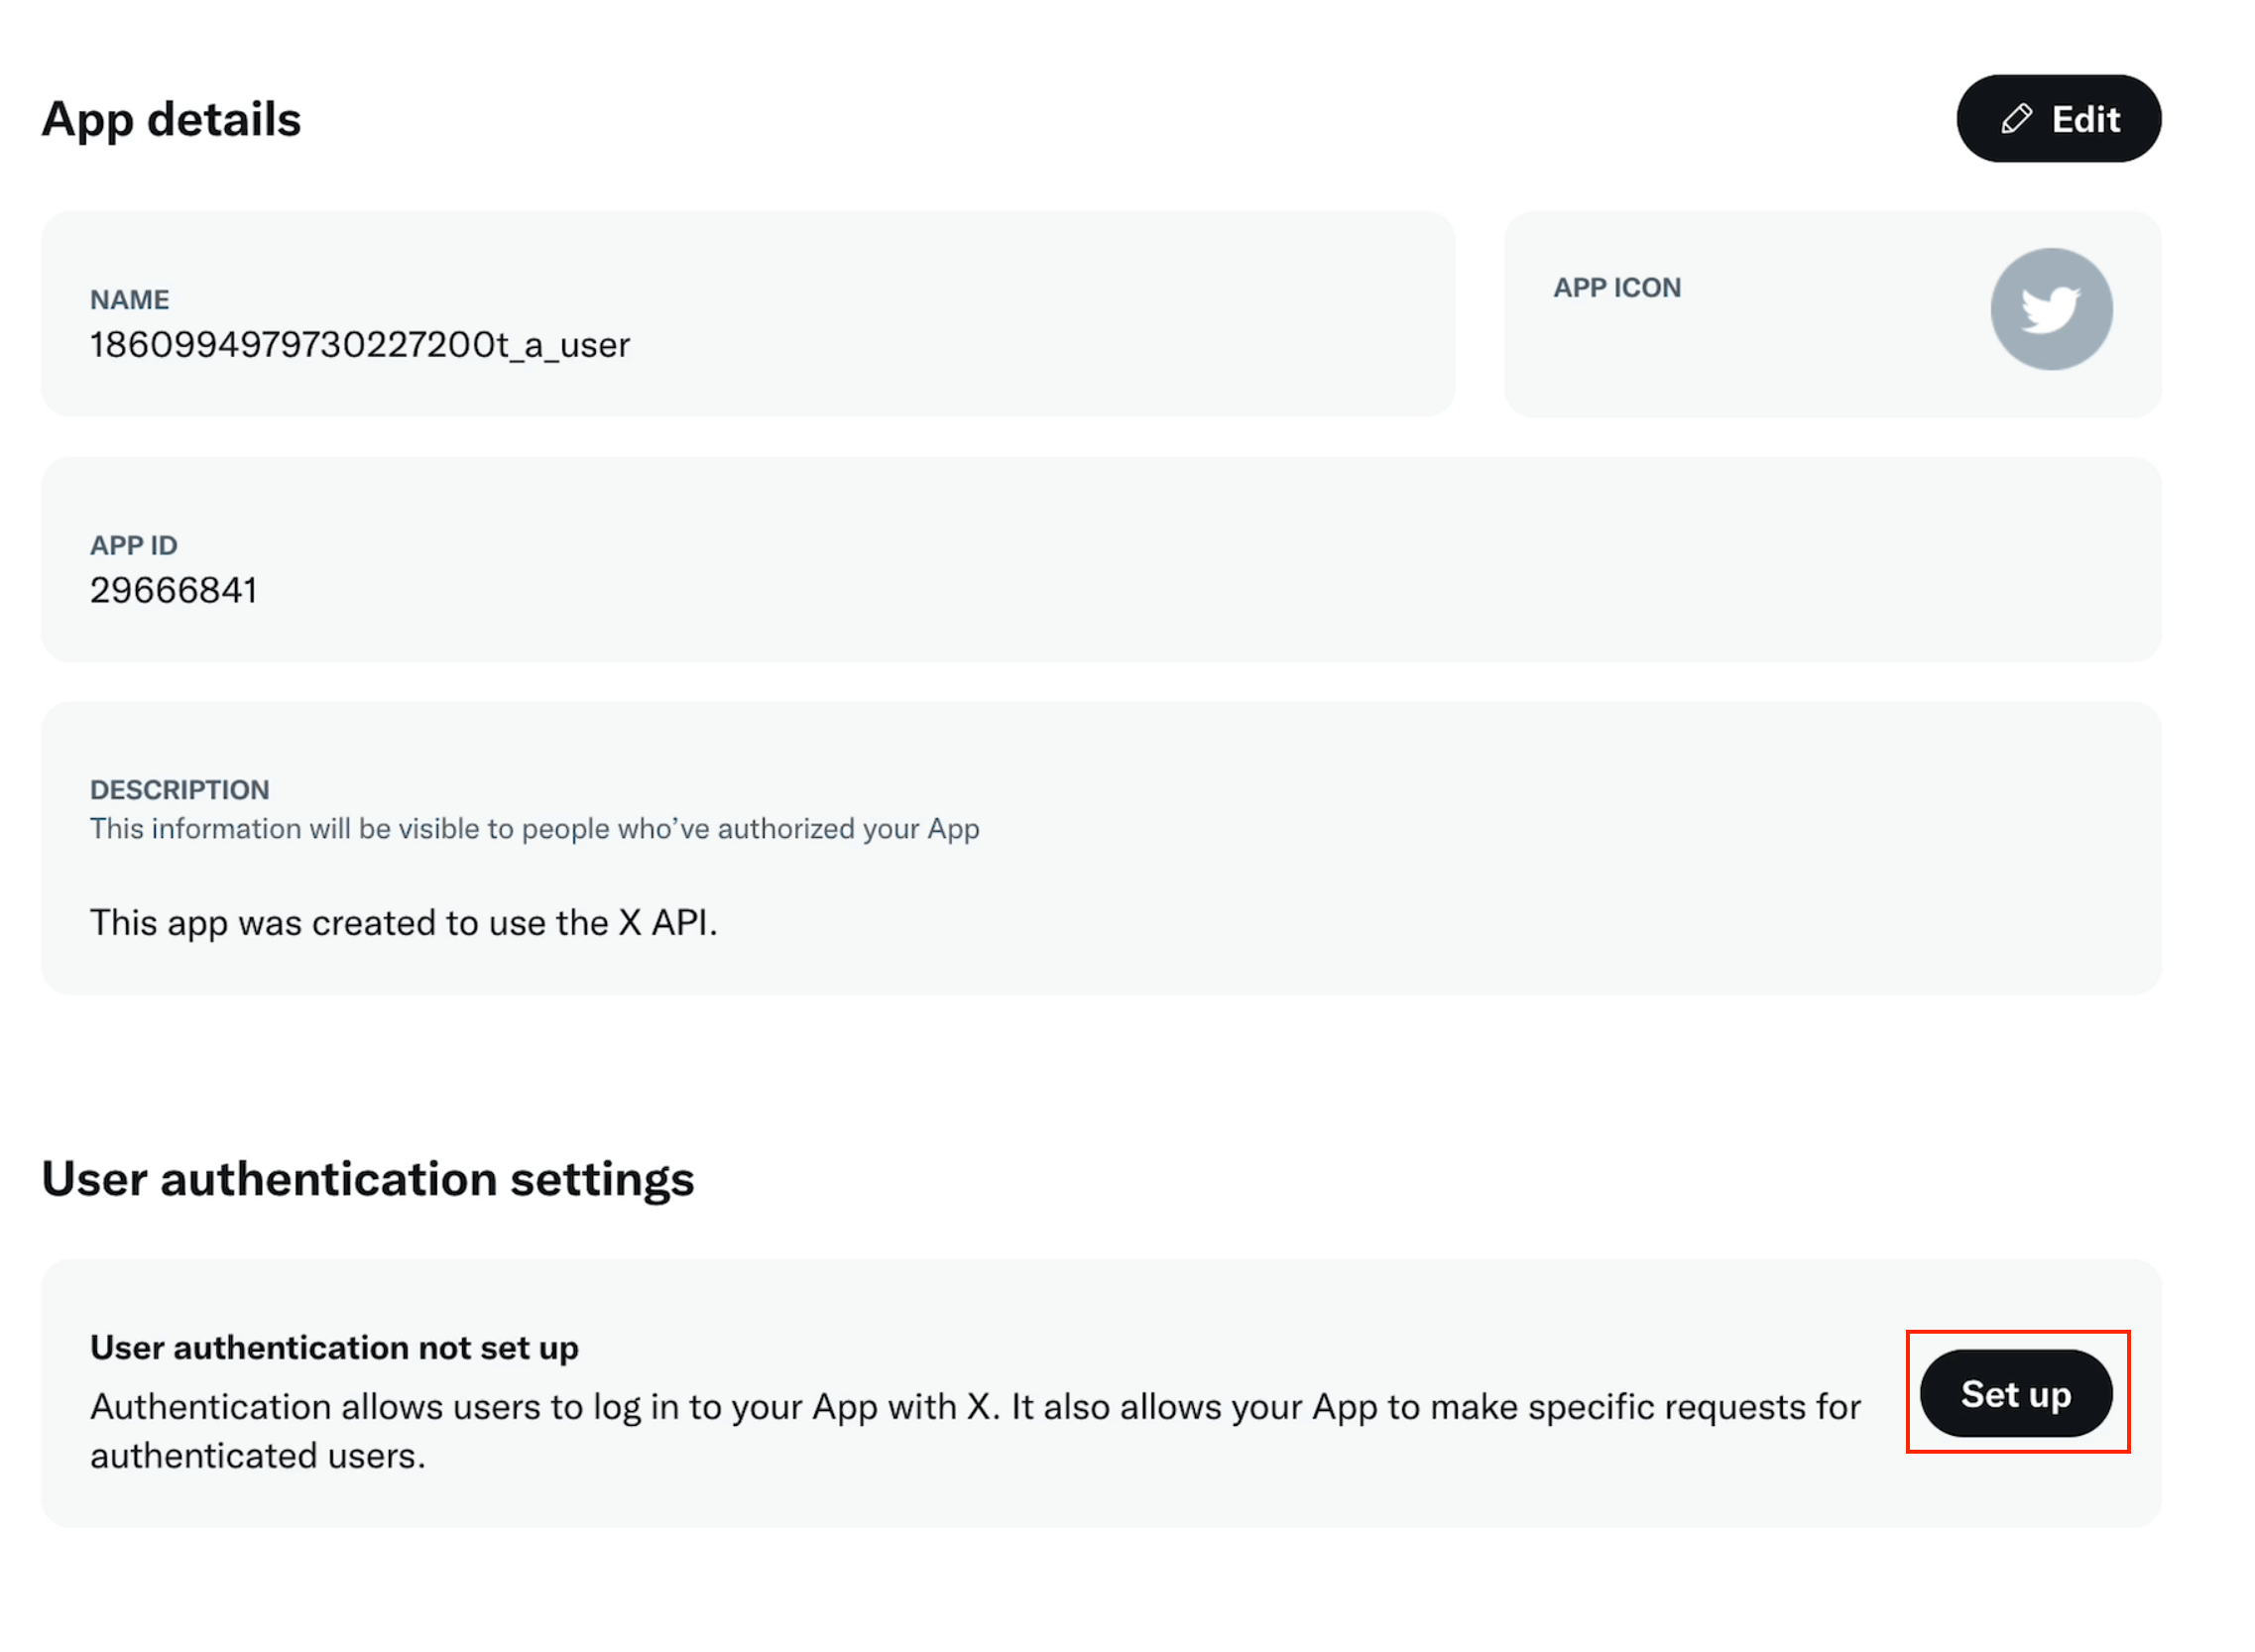
Step 1: Open App Settings
- On the Developer Portal homepage, locate your app name and click the gear icon next to it.
- This will take you to your app’s settings page.
- Under User Authentication Settings, click Set up to begin configuration.
Step 2: Configure User Authentication
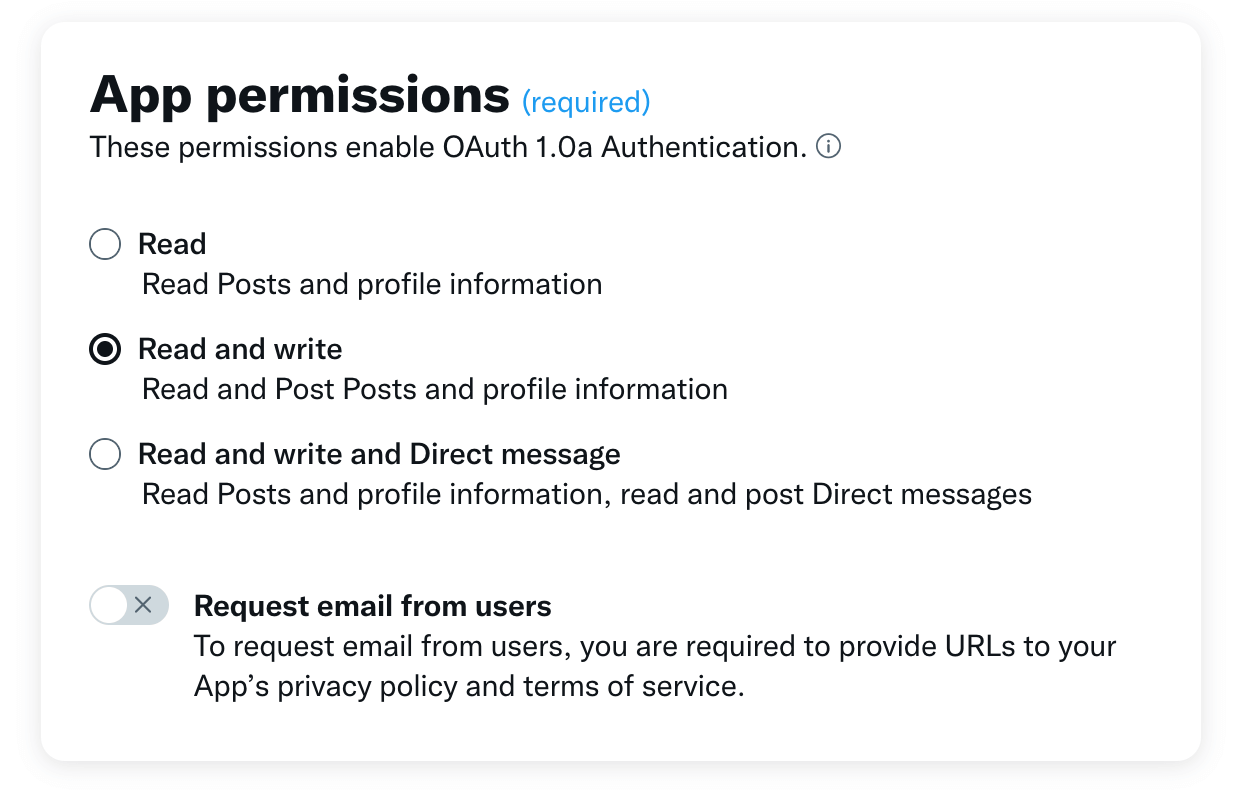
- Adjust the following settings on the User Authentication page:
- App Permissions: Select Read and write.
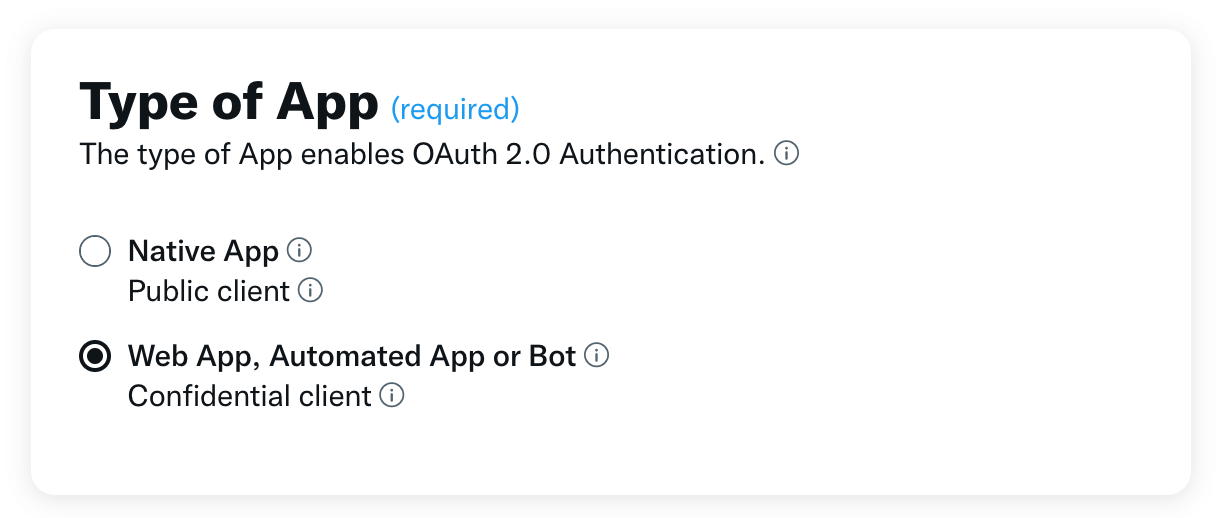
- Type of App: Choose Web App, Automated App, or Bot.
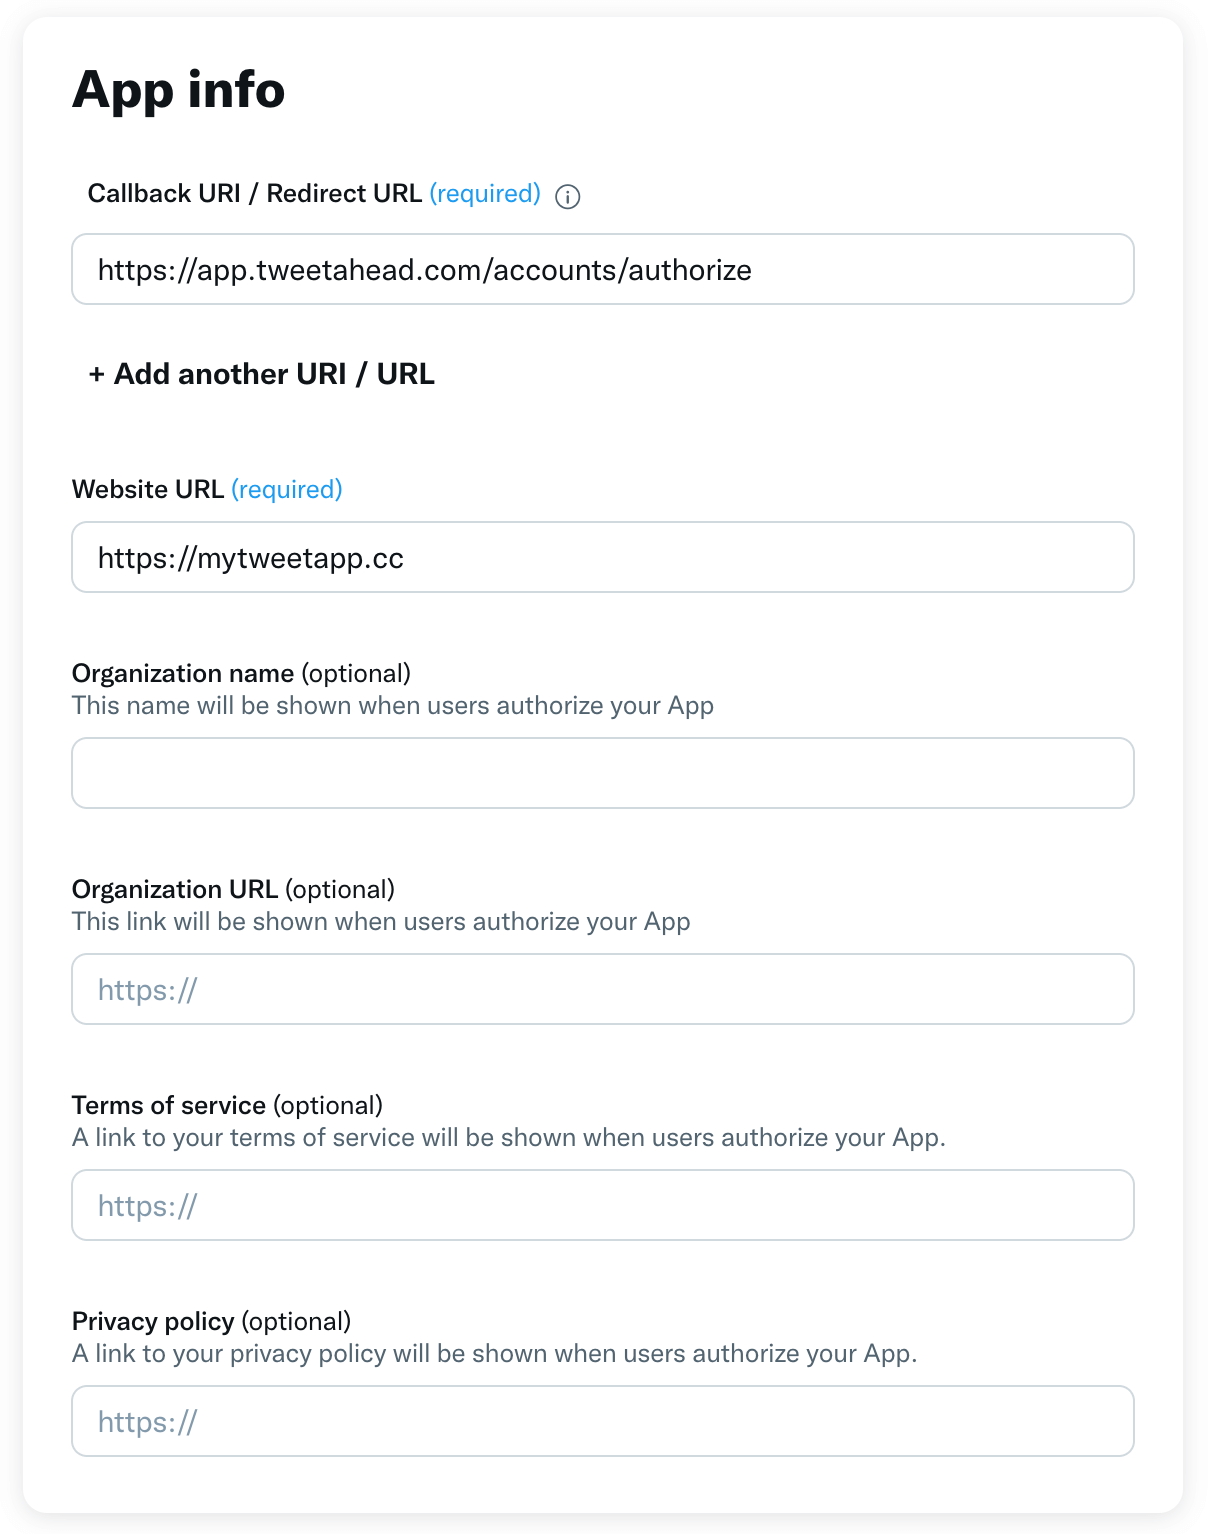
- App Info: Provide the following details:
- Callback URI / Redirect URL:
https://app.tweetahead.com/accounts/authorize - Website URL: You can use any URL (it’s not checked).
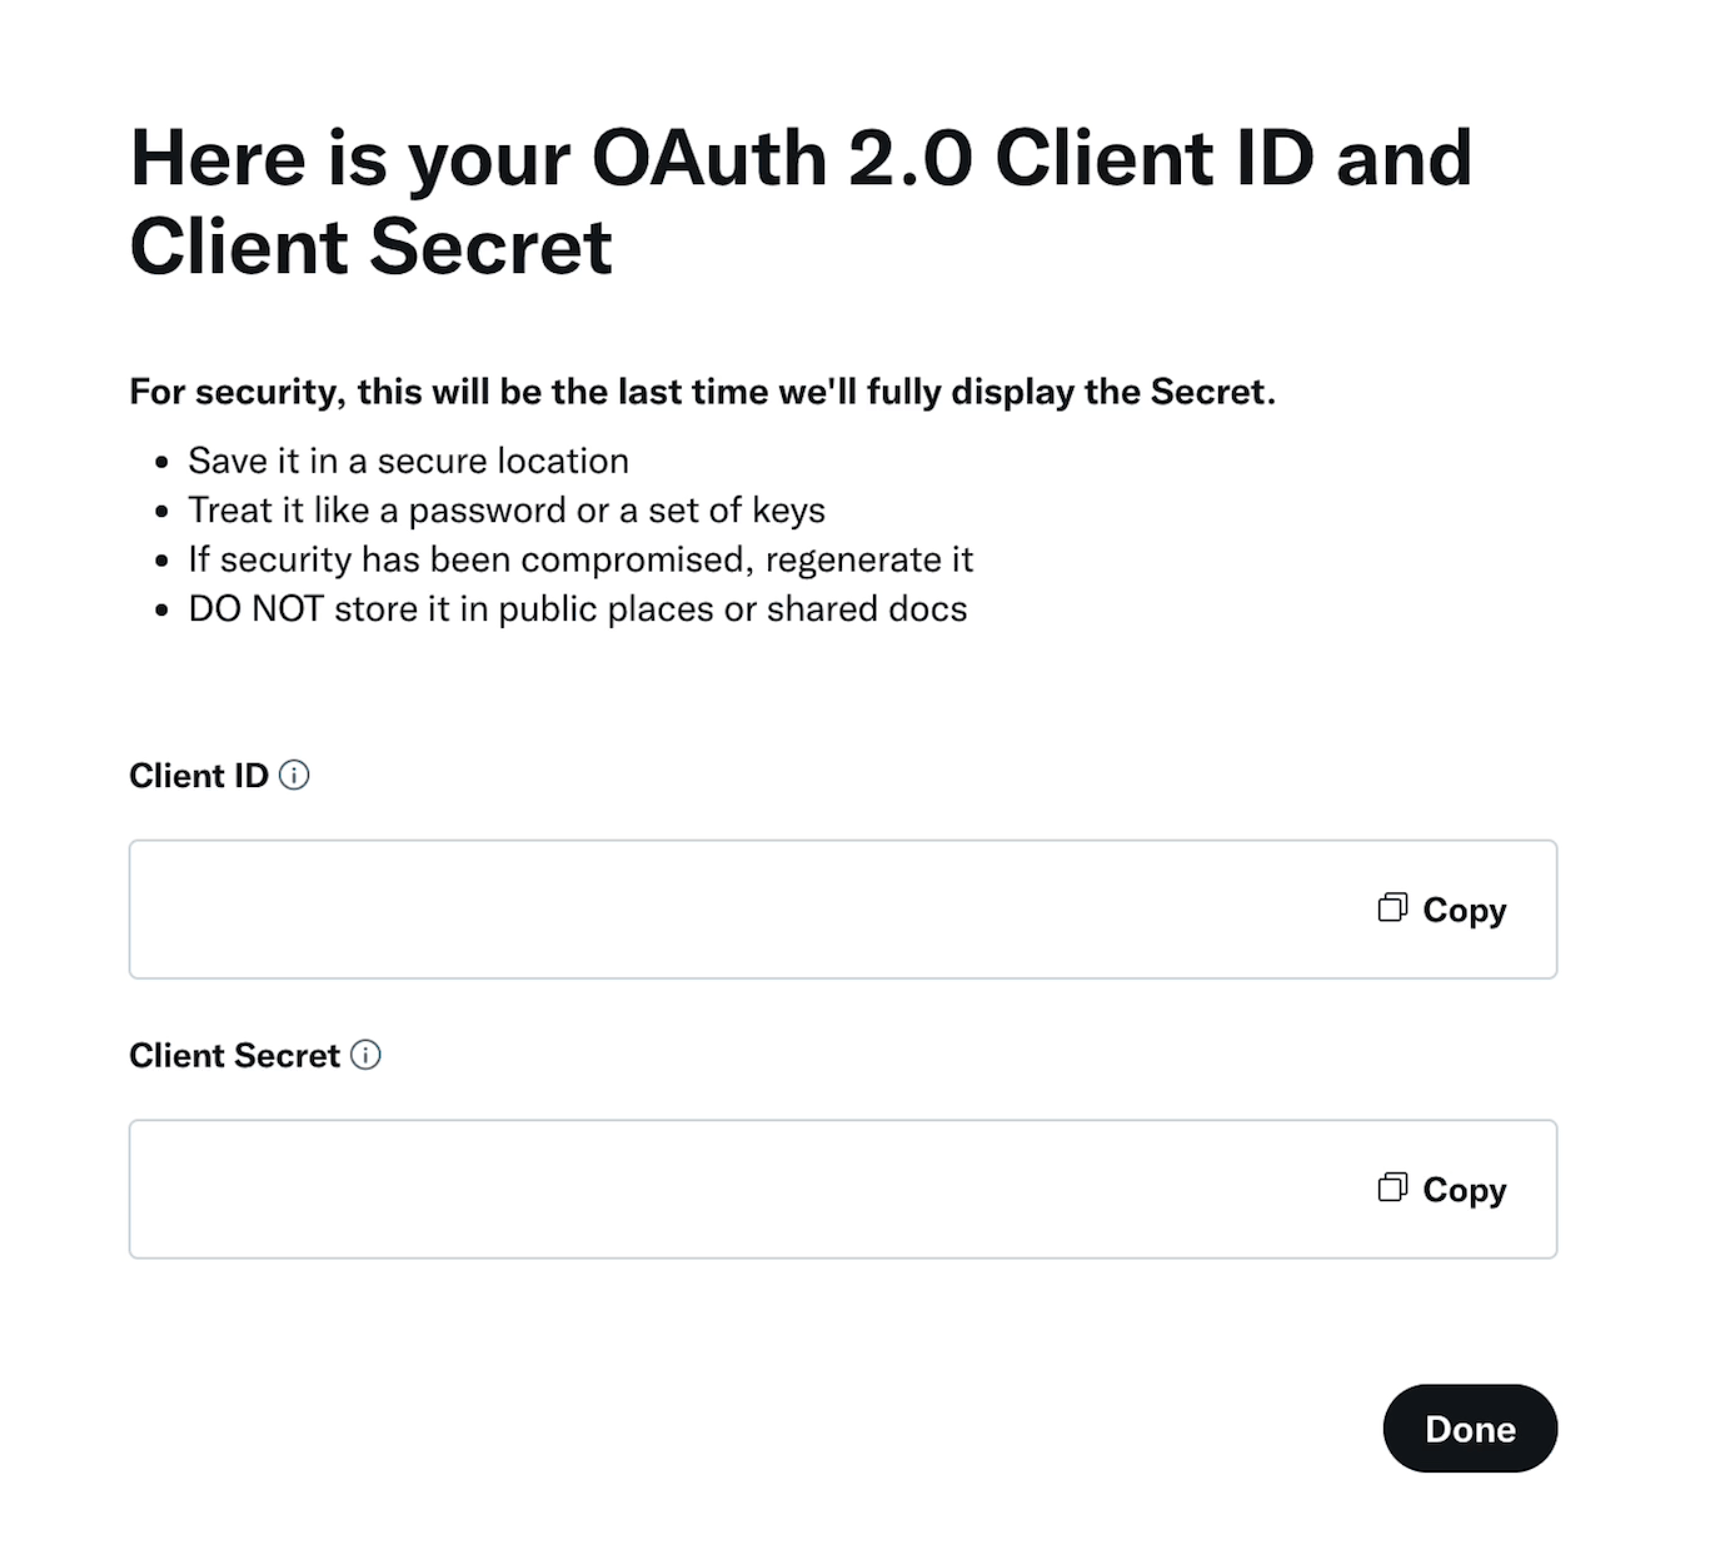
- Click Save and confirm the changes.
- After saving, you’ll see your OAuth 2.0 credentials. Save these in a safe place. Note: These credentials are not used for TweetAhead.
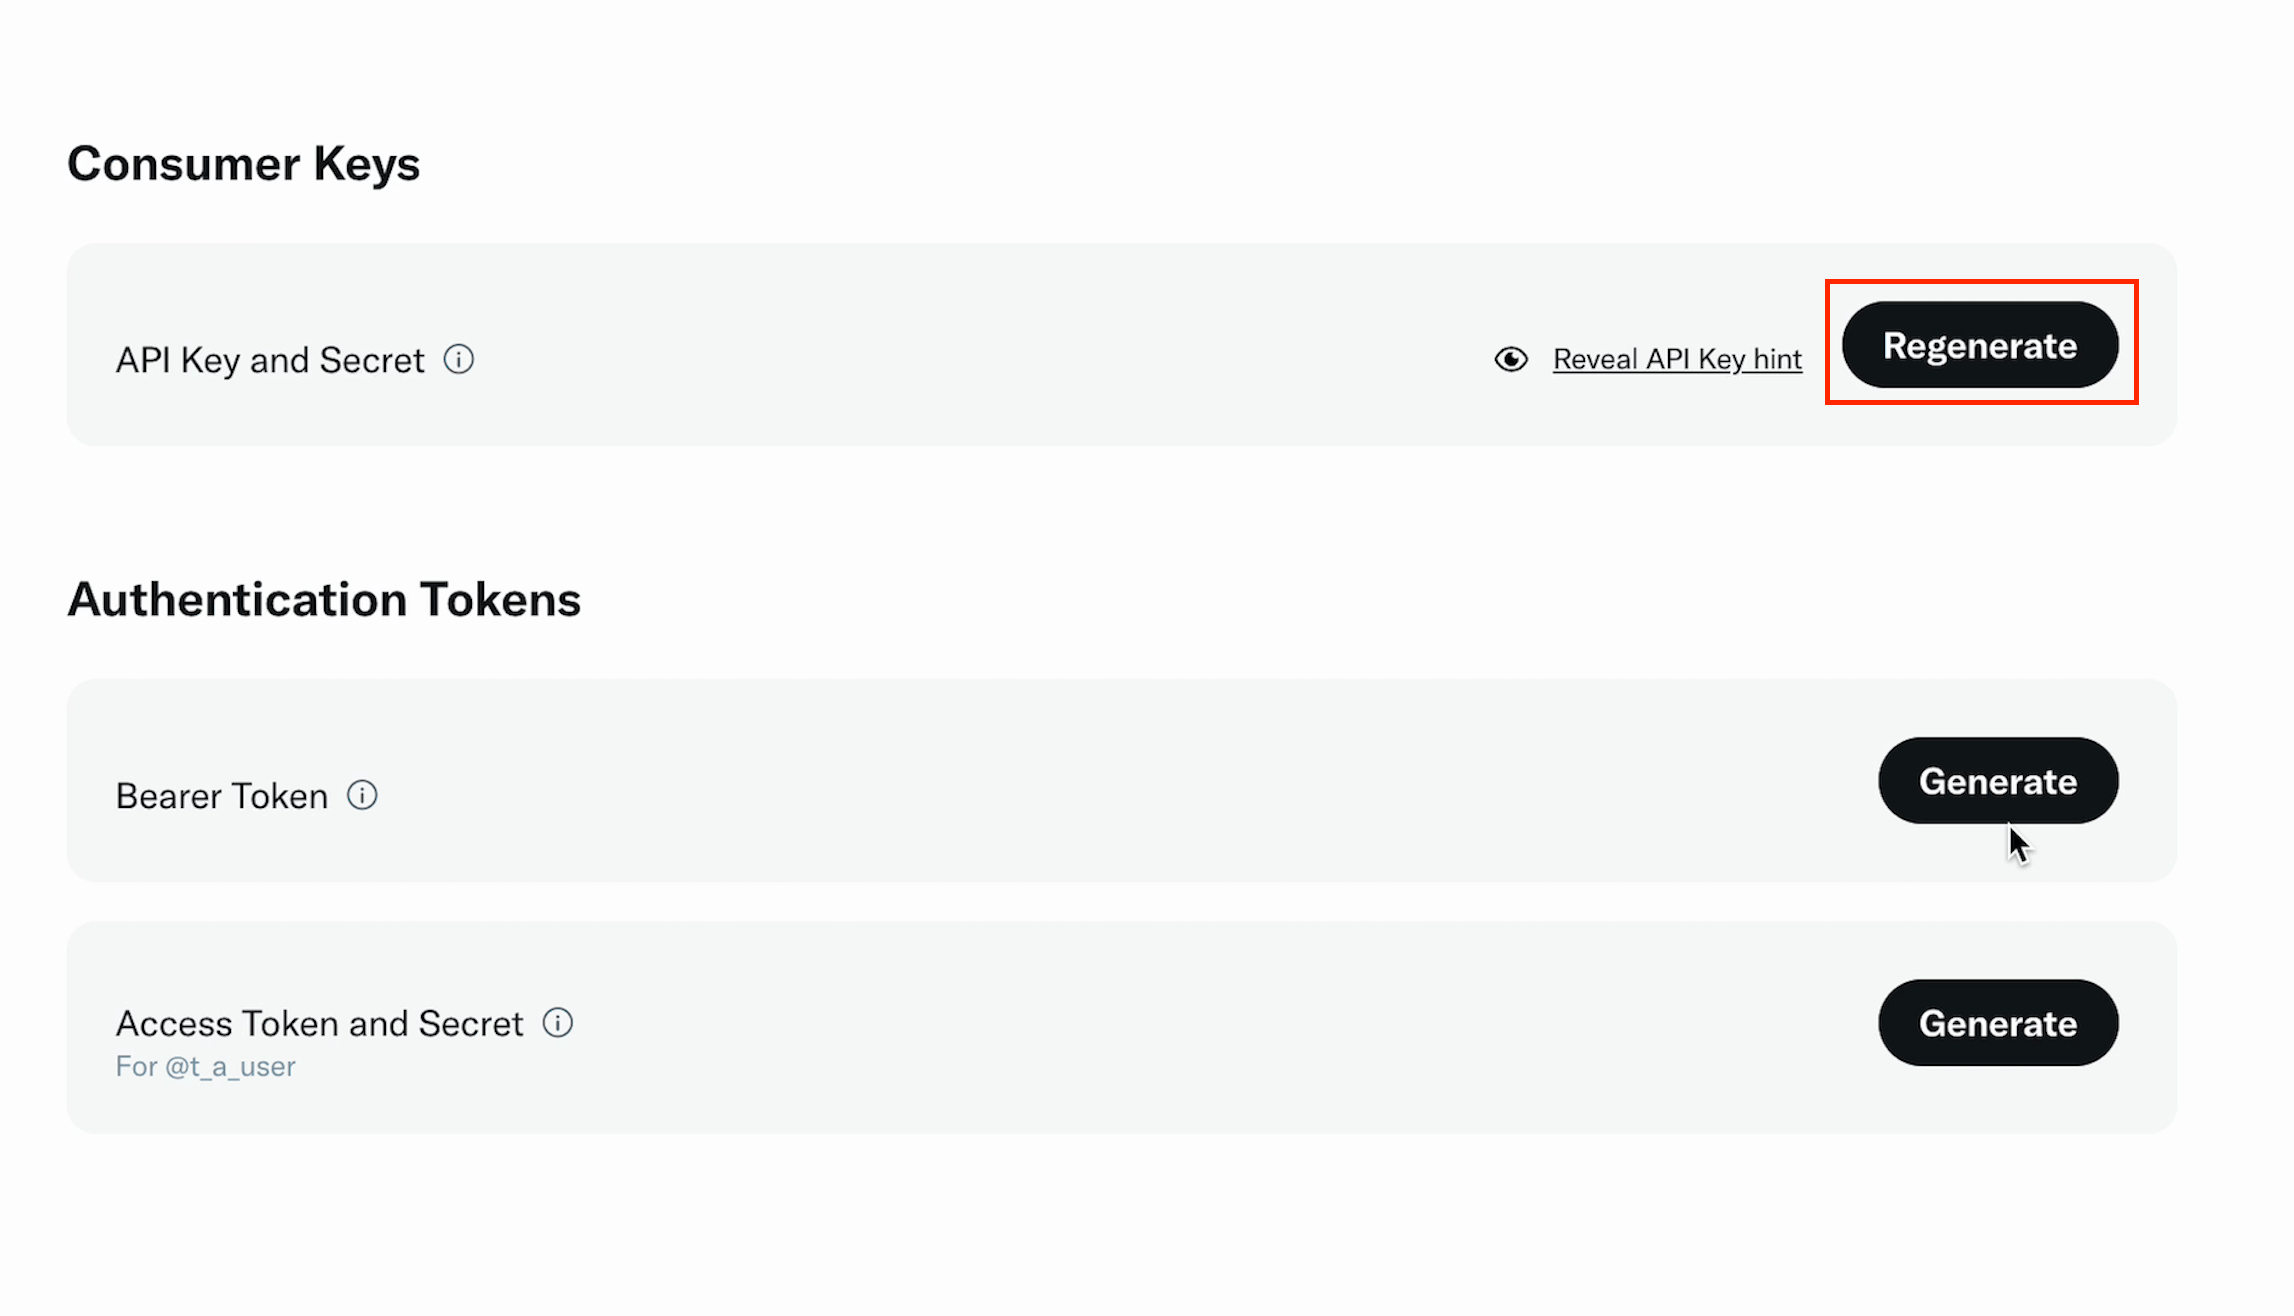
Step 3: Generate Consumer Keys
- Navigate to the Keys and Tokens tab in your app settings.
- Under Consumer Keys, click Regenerate to create new API keys.
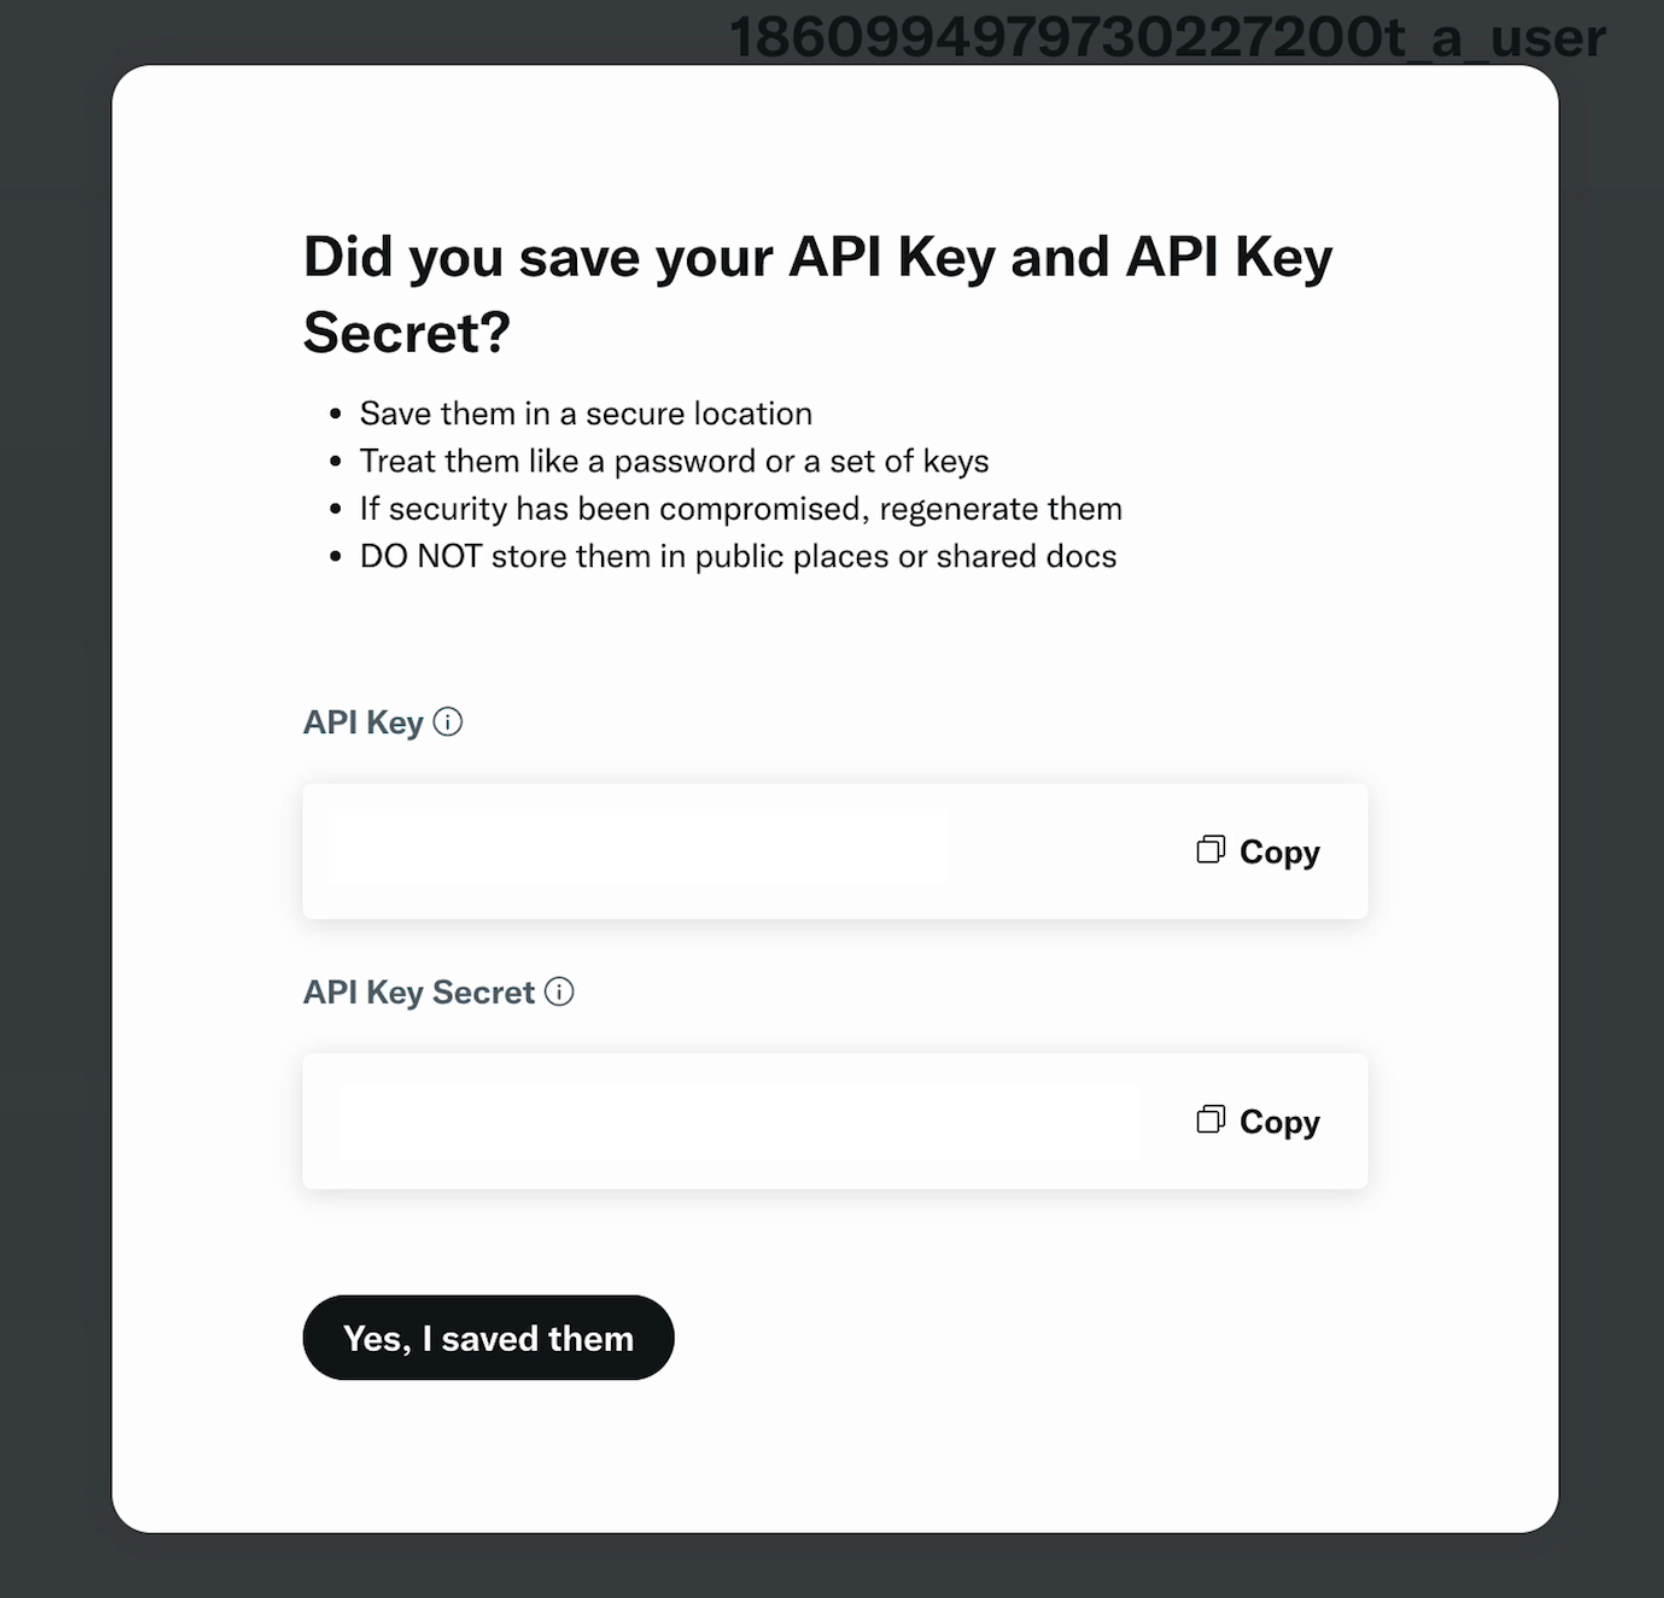
- Confirm the regeneration and save your API Key and API Key Secret. You’ll need these to connect your account to TweetAhead.

Setup Completed!
That’s it! You now have a developer account and the API credentials required to connect your account in TweetAhead.